For the correct function of the eye-tracker it is important that the camera lens is focussed at the subject-distance defined in the Physical setup settings. The following describes the procedure to adjust and verify the camera focus.
Prepare EyeVec focus calibration marker
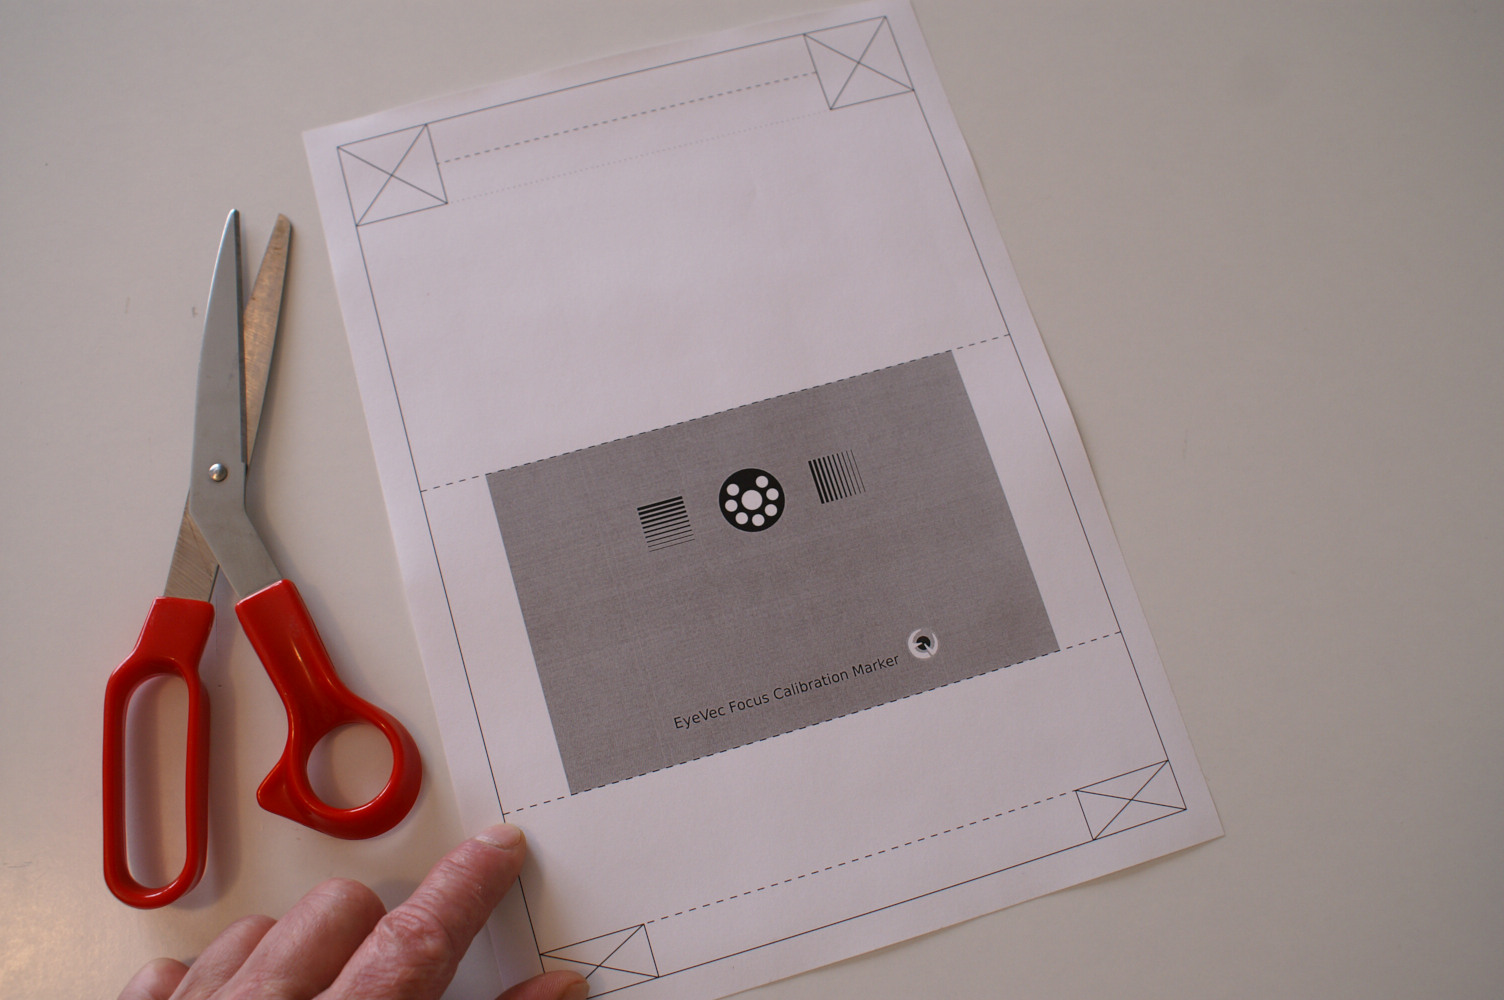
You will need a printed copy of the EyeVec Focus Calibration Marker. This is a one page PDF document showing a gray area with an EyeVec marker on it. Print it at 100% scale. The marker diameter should be 20.0mm.
If you have an object slider device then cut out the marker with plenty of gray around it and fixate it on the slider in vertical orientation.
If you do not have a object slider device then proceed as follows:
-
Take the printout and cut away the crossed out rectangles.
-
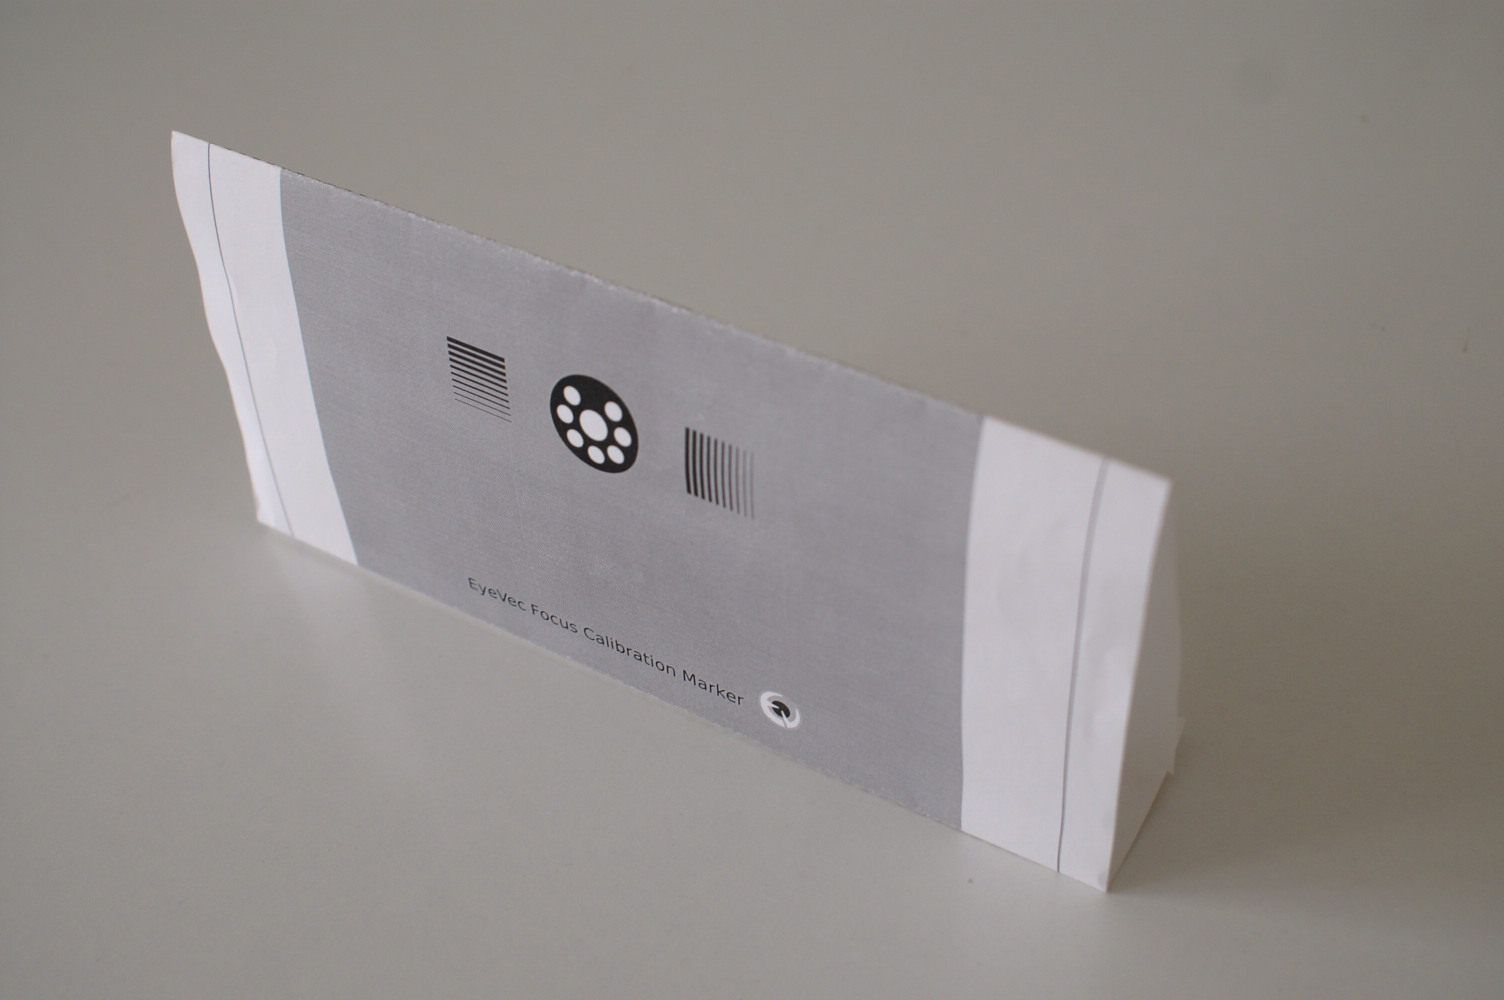
Fold the sheet along the dashed lines to get the shape as in the second photo below.
-
Staple the short sides as in the third photo.
-
Adjust the shape so the marker is in vertical position, not leaning forward or backward.

Position the eye-tracker and calibration marker
Set the eye-tracker height to its lowest position (or raise the marker) so the camera and marker are at the same height.
Check if the focal-ratio of the camera lens is set correctly. For the R1’s 16mm lens it should be set at 2.0. For the R2’s 25mm lens it should be set at 2.2.
Place the marker roughly at the recommended subject distance. For the R1 this is 600mm. For the R2 it is 650mm.
Start the eyevec-control program. Double-check the subject distance in the Setup page. Make sure the camera lens focal length setting is set to default (or accept the current value if you know it is probably pretty close). In case you changed a setting hit Save and restart the application.
In the Participant page disable detection of both eyes. In the Settings page disable face blob detection and enable marker detection.
Go to the Camera page and make sure the marker is horizontally centered in the image. Hit Ctrl+f to enable display of the marker sharpness indicator.
Move the marker to the defined subject distance. Use a measuring tape to measure the distance from the orange line on the camera lens to the marker.

Adjust camera focus
Underneath the marker symbol in the camera image you’ll see a bright green line. The length of this line represents image sharpness.

Loosen the camera focus ring fixation screw. Adjust the focus ring to maximize the sharpess indicator. Then gently tighten the camera focus ring fixation screw.
Adjust focal length setting
The distance reported on the right hand side of the camera image will be close to the expected distance, but it may be off by a few millimeters. We can fix that if desired. When the sharpness indicator is displayed there will be two additional fields visible below the Load indicator: Focal length [px] and Focal length [mm]. These are normally not visible. Each time you hit Ctrl+f the numbers shown will be updated. Hit Ctrl+f a few times to see if the numbers reported are stable.
Write down the reported focal length in pixels and adjust the focal length setting in the Setup page and Save the changed setup settings.
Quit eyevec-control and restart it. Again disable eye detection and enable marker detection. Check the reported distance. It should be as expected.